
Photoshop Blur filters: What they’re and exercise them
What save they save, how save they work, & what are they mature for?
Take care of shut Schultz
As of late’s Most efficient Tech Offers
Picked by PCWorld’s Editors
Prime Offers On Immense Merchandise
Picked by Techconnect’s Editors
Account for Extra
Photoshop Blur filters are designed essentially for retouching photography—to melt, haze, cloud, fuzz, or distort explicit areas of a image or the total image. Backgrounds are in overall blurred out to intensify the critical field of a photograph, or to diminish clutter in the atmosphere. Blur filters furthermore rep, then fuse the colors in a explicit build to designate a particular designate a lot like motion.
Blur results explained
For those that hang Filter > Blur, Photoshop displays a dropdown menu with 11 Blur results. They’re defined as follows (and grouped by similarity):
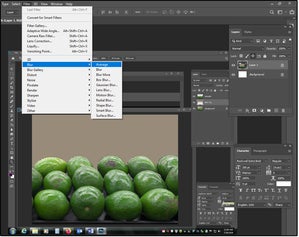
Average: Photoshop considers your complete colours of a explicit build, then calculates the trendy color of the blended hues, and fills the build with that color. Once the build is “averaged,” that it’s most likely you’ll well also convey extra results a lot like a soft gradient, a straightforward texture, or a modest sample to designate an uncluttered background that doesn’t “compete” with the critical field of the image.
 JD Sartain / IDG
01 Utilize the Photo shop Average filter to equalize and unclutter backgrounds.
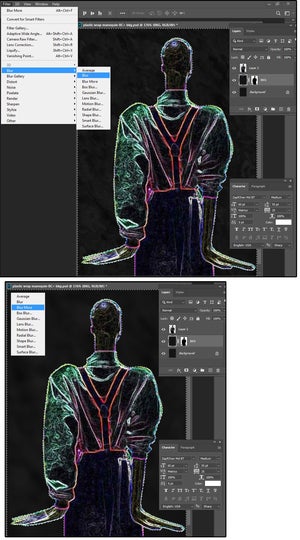
Blur: Utilize this filter to melt the jagged edges of an object you “slice out” (utilizing the lasso or the pen tool) from the next photo. It’s furthermore very precious for cutting back noise in a image coated with grime particles, scratches, half of-tone dots, or a Moiré sample from a scanned web page. This is an in particular efficient reply for an worn wrinkled or scratched photo that’s been scanned.
Blur Extra: The identical results because the Blur filter, most productive elevated by four cases the designate. The adjustments are delicate on both Blur and Blur Extra, so that that it’s most likely you’ll well also possess to “Blur Extra” continuously to plan the desired consequence.
 JD Sartain / IDG
02 Utilize the Photoshop Blur & Blur Extra filters to melt edges and at ease over image defects.
Box Blur & Gaussian Blur filters
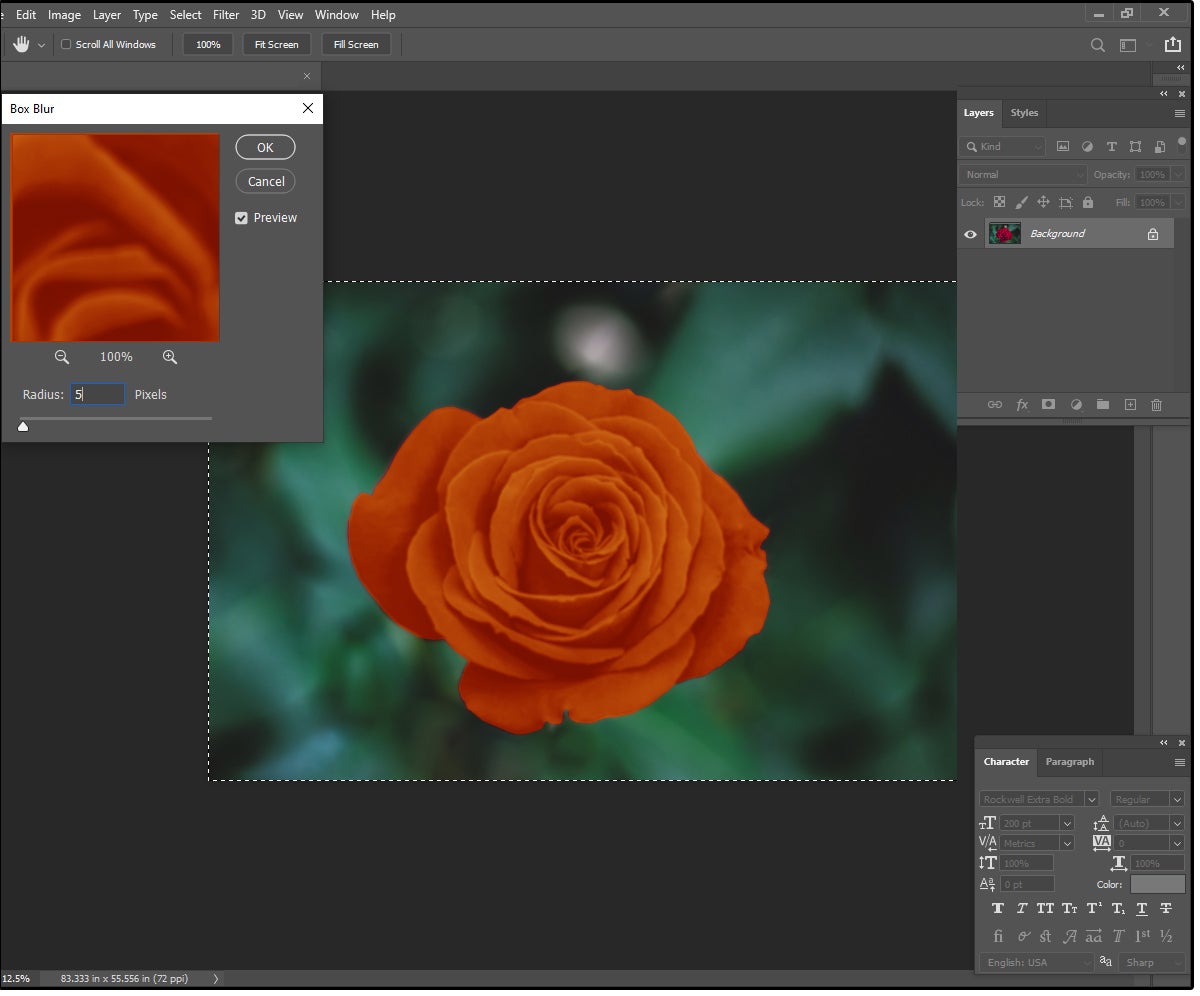
Box Blur: The Box Blur finds the perimeters of the objects in an image, then averages the colors of the pixels adjacent to the arrangement objects to designate a soft, silky blur designate. With contrasting colours, the Box Blur creates delicate, glowing edges between the objects or the objects and the background. Utilize this filter to melt the petals of a flower (look our coral rose in figure 03), while simultaneously bettering the perimeters so the flower stands out in opposition to a busy background.
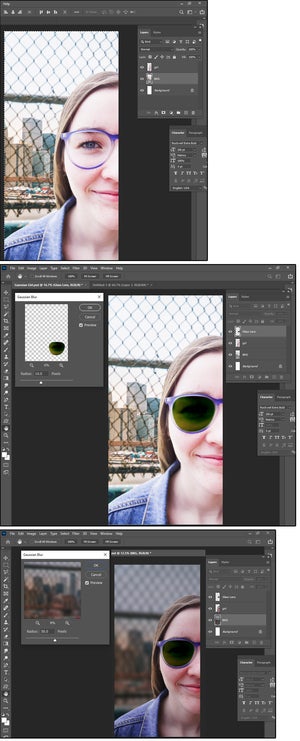
Gaussian Blur (or Gaussian distribution) looks to be to be the most traditional. It makes exercise of a bell-fashioned curve, which has its absolute most sensible point in the center, then decreases on every aspect (finest love a bell) to blur the selected build of an image. It makes exercise of a sliding scale from 0.1 to 1000, which produces a wide desire of results.
 JD Sartain / IDG
04 Photoshop’s Gaussian Blur is a favored desire.
Exhibit that the perimeters of the selected build maintain colours from the surrounding areas, which would possibly possibly well also create a fuzzy or feathered provide an explanation for. To aid away from this rep (slice out) the surrounding build first, blur, then paste the surrounding build encourage into location (which will doubtless designate a now not easy edge except you a diminutive of blur the perimeters of the slice-out build as correctly).
In our instance (look figure 04), the client desired to exercise a particular photo of a younger girl, however he wanted the girl’s identification masked, and the background was once a cluttered mess. First, we changed the Colour Stability to indulge in the glasses be taught about love shades.
We mature the Gaussian Blur at a Radius of 10 to blur the brand with the glass lens. Next, we adjusted the Brightness/Inequity on the girl’s face to -100 and +40, respectively. And final, we adjusted the Brightness/Inequity of the glass lens to -80, +50, respectively.
For the busy background, we adjusted the Brightness to -150 and the Inequity to +10. Then we mature the Gaussian Blur at a Radius of 50 to a diminutive of blur the background ample to showcase the girl, however aloof aid a hazy take a look at out of the metropolis and the fence on the encourage of her. The shopper loved it!
 JD Sartain / IDG
03 Utilize Photoshop’s Box Blur to designate a soft, silky designate with glowing edges.
Lens Blur filter & Movement Blur filter
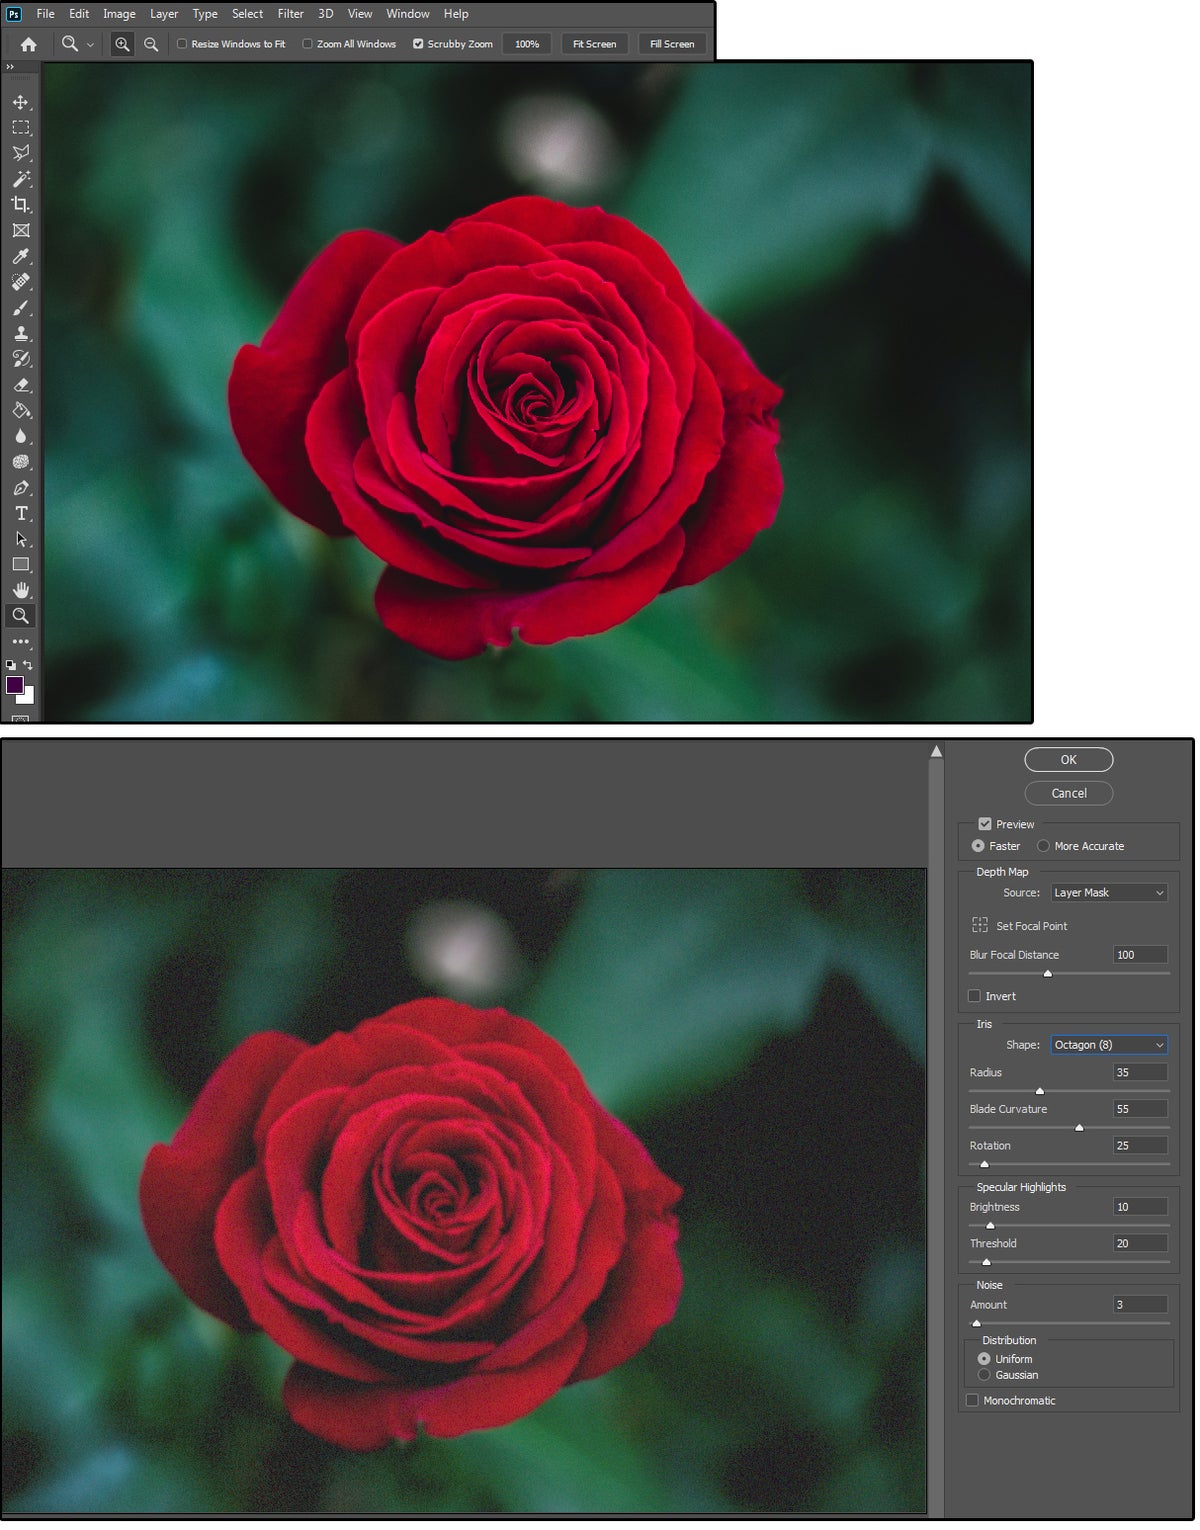
Lens Blur: Utilize this filter to adjust the depth of field on your photography—to illustrate, to blur out a cluttered background or enhance a fuzzy background. This remarkable filter affords 14 levels of adjustable results, including six shapes and plenty of different depth draw decisions. That you just would be in a position to also possess greater maintain watch over over the final consequence of your image because of that it’s most likely you’ll well also stunning-tune so many results.
Take a look at out the red rose in figure 05. We build the Blur Focal Distance to 100. We mature an Octagon form with a Radius of 35, a Blade Curvature of 55, and a Rotation of 25. For the Highlights, we did Brightness 10 and Threshold 20. The Noise was once build to a pair with Uniform Distribution. The ravishing red rose looks to be to be like love velvet on a background of green sand.
 JD Sartain / IDG
05 Utilize the Lens Blur to adjust depth of field.
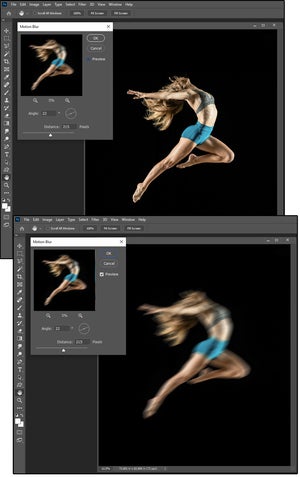
Movement Blur: The Movement Blur does precisely what that it’s most likely you’ll well quiz—it creates the semblance of motion. For those that photo a transferring arrangement, that it’s most likely you’ll well also “quit” the action with digicam settings or build your shutter trudge to 1/60th of a 2d (give or hang), and shoot the subject “in motion.” With Photoshop, finest exercise the Movement Blur filter. Settings encompass the attitude of the motion (from zero to plus or minus 360 degrees) and the space of the spreading pixels—that is, how a ways the image is stretched to emulate the circulate.
 JD Sartain / IDG
06 Utilize the Movement Blur to designate motion.
For our instance, we mature a dancer leaping in the course of the air (look figure 06). We chose an attitude of 22 degrees, so she would seem like transferring ahead and up. For the space, we chose 215 pixels, so she would be finest blurred ample to replicate motion without cutting back her image to blurred traces.
Radial Blur & Form Blur filters
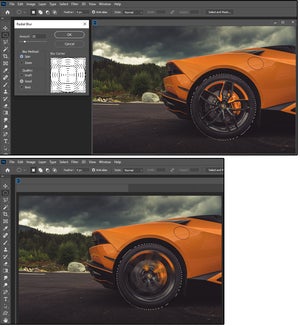
Radial Blur: The Radial Blur is mature to designate a round distortion around an object, which would possibly possibly even be focused or applied to the total image. Visualize the ripples in a pond around a dropped pebble. With this filter, that it’s most likely you’ll well also adjust the Amount (or diploma) of the blurring; the Intention (Spin: alongside concentric round traces or Zoom: alongside the radial traces); the Quality (Draft, Greater, Most efficient); and the choice to construct the Blur Center.
Essentially the most glaring exercise for the Radial Blur is with round objects in motion such because the wheels on a tire. For our instance, we mature the elliptical marquee tool to elevate the tire on this sports activities automobile (figure 07). We chose “20” for the Radial radius, Spin (as an alternative of Zoom) for the Blur Intention, and “Correct” for the Quality (as in opposition to Draft or Most efficient). Now the automobile looks to be to be transferring swiftly because of of the spinning tires.
 JD Sartain / IDG
07 The Radial Blur creates “ripples” in a round motion on your photography.
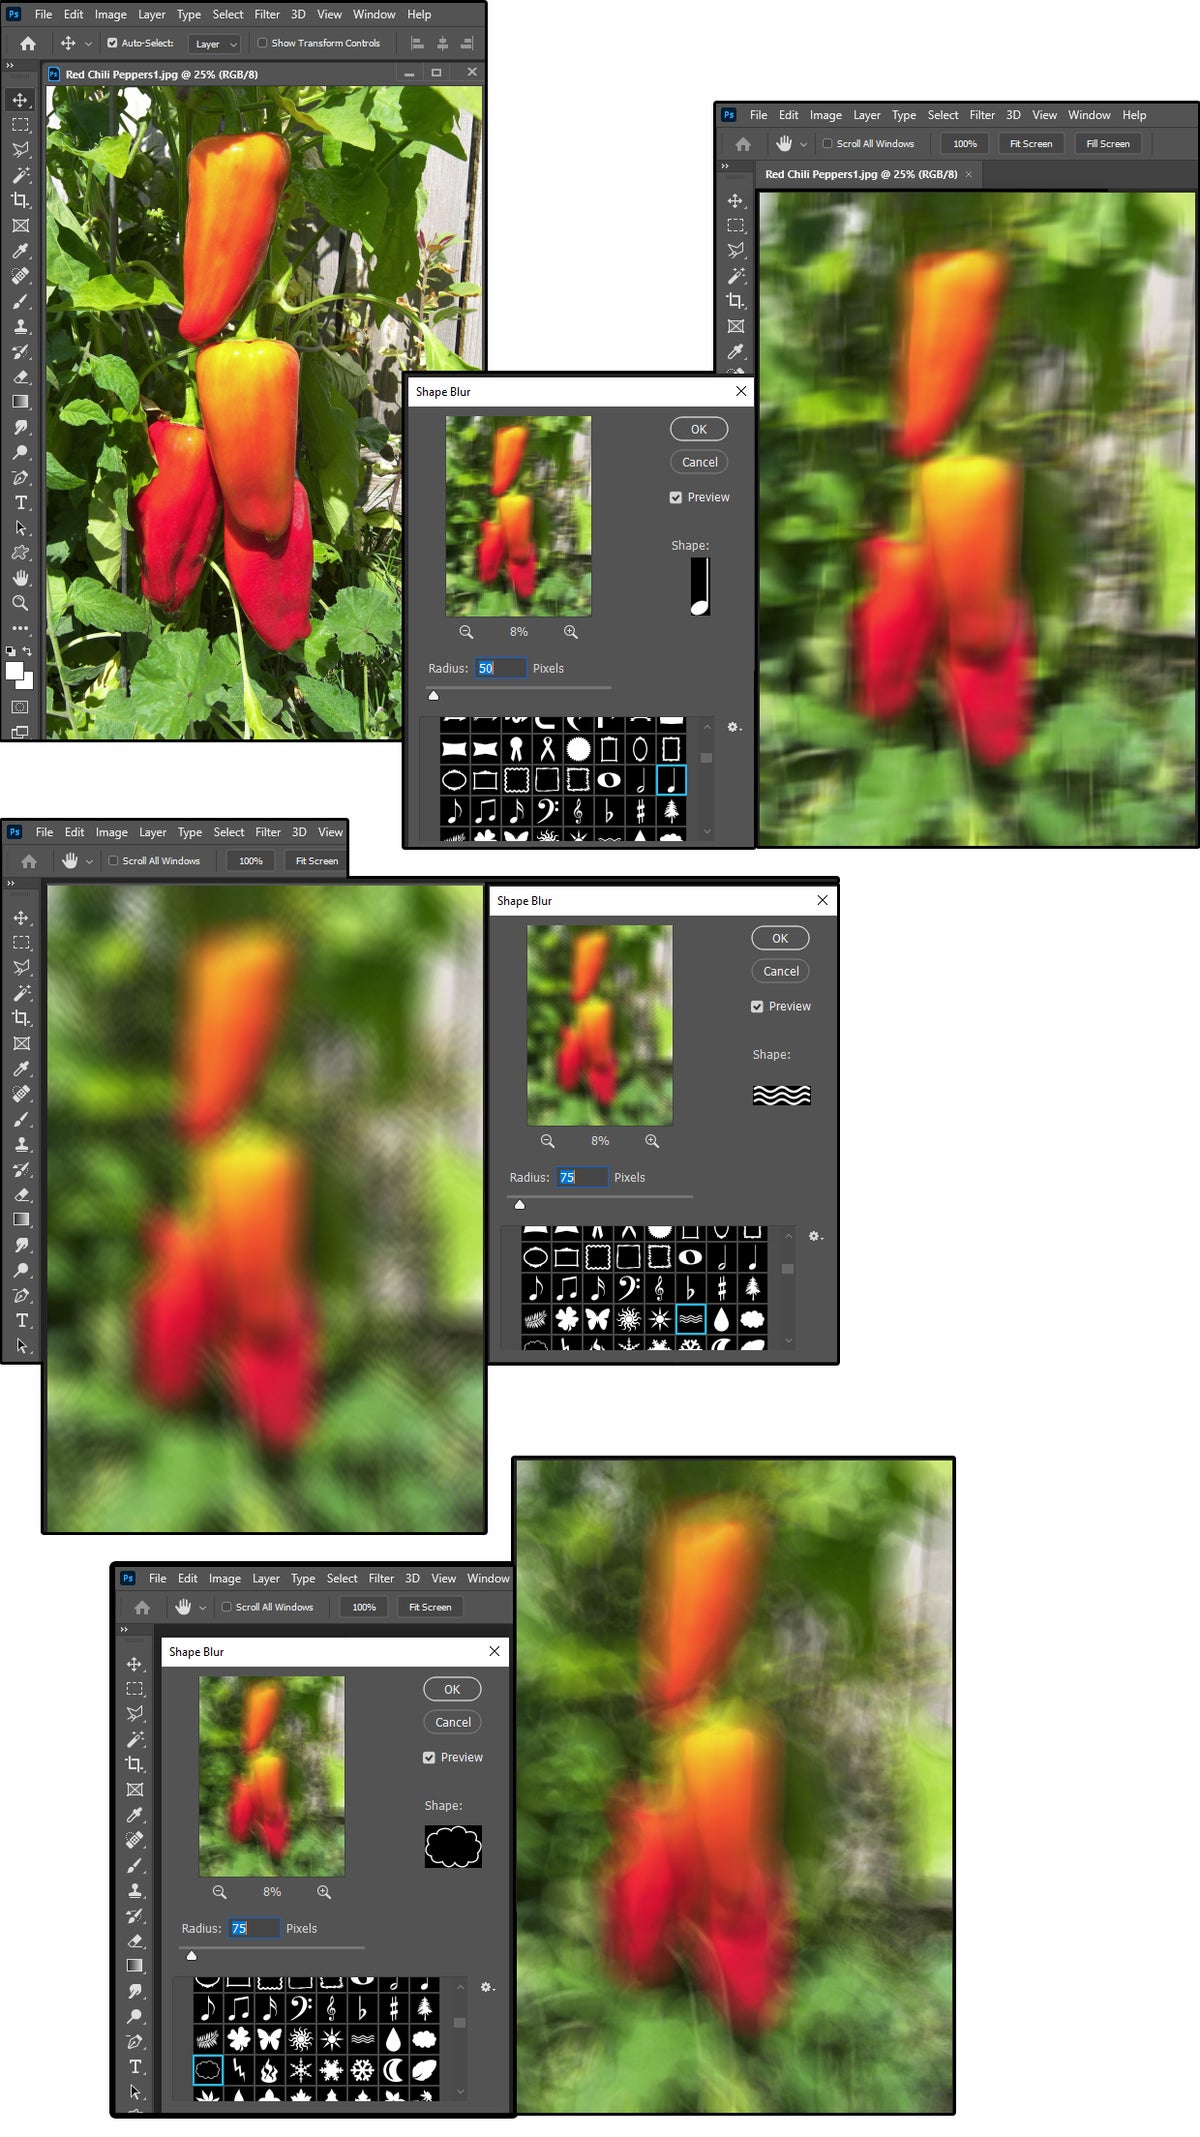
Form Blur: This designate makes exercise of something called an image kernel, which is on the total a two-dimensional matrix of pixels, where every pixel is represented by a bunch. Essentially essentially based on the image mode (RGB, CMYK, Grayscale, and loads others.) and the bits per channel (8, 16, 32, and loads others.), the kernel makes exercise of these values to plan a brand new image. Take care of shut your kernel from the Form presets installed on your system, then hang a radius value (from 5 to 1000) to blur your image into a form that loosely suits the preset you chose.
We experimented with plenty of Form presets to behold what this Blur designate produced. We began with some red chili peppers rising in my garden. We selected the total image, then chose a song display veil because the Form preset with a Radius of 50 pixels. The designate confirmed vertical traces echoing the stem of the song display veil for the period of the image.
Next, we chose wavy traces with a Radius of 75 pixels. The tip consequence was once love taking a behold through a slice-glass vase or a crosshatched ground, a lot just like the crosshatch brush in Photoshop’s Brush Strokes Filter Gallery.
Final, we selected the outlet cloud preset with a Radius of 75 pixels, which produced semi-round blur patterns a lot like a beehive across the bottom of the peppers image. The tip consequence was once a soft, dreamy designate that triggered a sleepy response.
 JD Sartain / IDG
08 Photoshop’s Form Blur makes exercise of Form presets to designate frosty results.
Stunning Blur & Surface Blur filters
Stunning Blur: This filter makes exercise of meticulous accuracy in accordance with dissimilar pixels, which contains specifying a Radius or build dimension (0.1 to 100); deciding on a Threshold (0.1 to 100); and deciding on blur quality (low, medium, excessive) or the blur Mode. The modes encompass Fashioned (for the total image), Edge Completely and Overlay Edge (for the color transitions, a lot like shaded-and-white edges or white most productive), respectively, to blur photography.
09 Utilize the Stunning Blur to plan an designate that looks to be love fading pixels.
For our sample, we chose a intellectual, nearly fluorescent-colored conceal. The design back was once to indulge in this image be taught about to find it irresistible was once airbrushed through a display veil veil, to offer it that tough, sandpaper appearance. To plan this, we selected a Stunning Blur Radius of 75 with a Threshold of 100. Then we chose Medium Quality and an Overlay Edge. The final product yielded a spooky, mysterious conceal straight out of the Voodoo Queen’s closet.
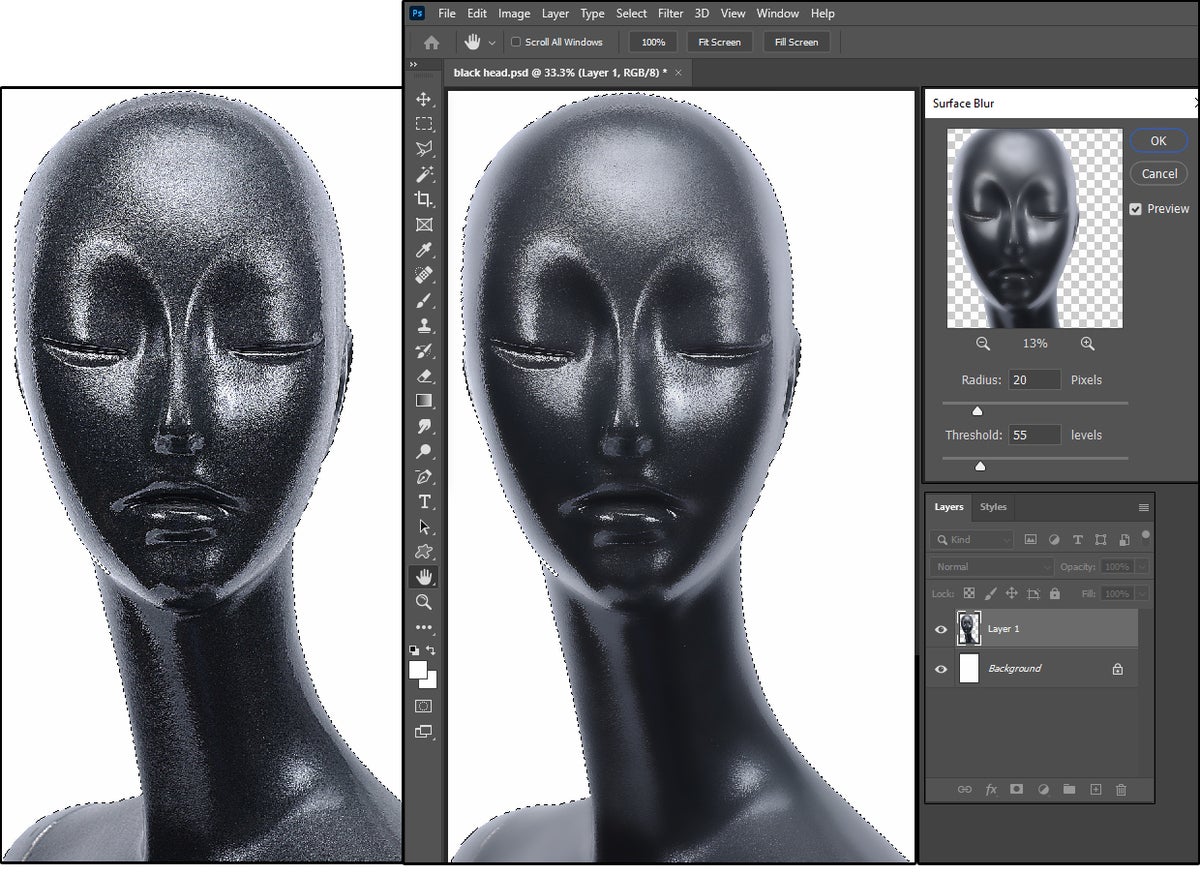
Surface Blur: Unlike the Stunning Blur, this filter maintains the perimeters while cutting back and smoothing out the noise or graininess. The Radius determines the build dimension (1 to 100). The Threshold regulates the tonal values of the adjacent pixels (2 to 255) and determines how a lot they need to deviate from the center pixel value in advise to be integrated in the blur designate–or now not, if the tonal values are decrease than the Threshold value.
Our mannequin is fabricated from spray-painted Styrofoam, so the feel is tough and grainy love low sandpaper. We had been tasked with smoothing her pores and skin, so she looked more love a shaded porcelain doll. We mature the Surface Blur Radius of 20 pixels and a Threshold with 55 levels to offer her a silkier complexion that looked more love pores and skin. The shopper acknowledged we succeeded.
 JD Sartain / IDG
10 The Surface Blur can at ease out even the roughest surfaces.
There truly will not be any apt or injurious approach to coach blurring results. The ideal advice I will offer is to experiment with the 11 various styles except you look one that works for you or your client.
IMPORTANT NOTE: Utilize the Text tool in Photoshop to indulge in notes on the settings you applied to every Blur filter. Build the files into a “Filter” folder so that that it’s most likely you’ll well also revisit them later when one other, a related assignment comes up.
Exhibit: For those that engage something after clicking links in our articles, we would also plan a itsy-bitsy price. Study our affiliate hyperlink coverage for more particulars.
JD Sartain is a know-how journalist from Boston. She writes the Max Productiveness column for PCWorld, a monthly column for CIO, and conventional characteristic articles for Network World.